
the problem
The scales are the Salter brand, model 1036. They were donated to me in a non-working state – the scales wouldn’t turn on.
diagnosis
sanity checks
Is it in warranty? This is the first thing you should check – if it’s in guarantee, and it’s failed in some way covered by the guarantee, get the original manufacturer to fix it. Salter in fact offer a 15 year guarantee on all of the kitchen scales. But given that this was donated, there was no proof of purchase, and I didn’t know where it was originally purchased from, so return wasn’t a great option (and completely honestly, I kind of wanted to have a go myself.)
I’d put a new CR2032 battery in already, but just to rule out it being a simple battery issue, we checked the battery with a multimeter. 2032s are 3-volt batteries, and we got a reading back of 3.16, so everything was fine with the battery.
The CR2032 is a 3-volt battery. If the measured voltage reads less than 10 percent of the rated voltage, then the battery needs to be replaced. For the CR2032, that voltage would be anything less than 2.7 volts.
getting inside
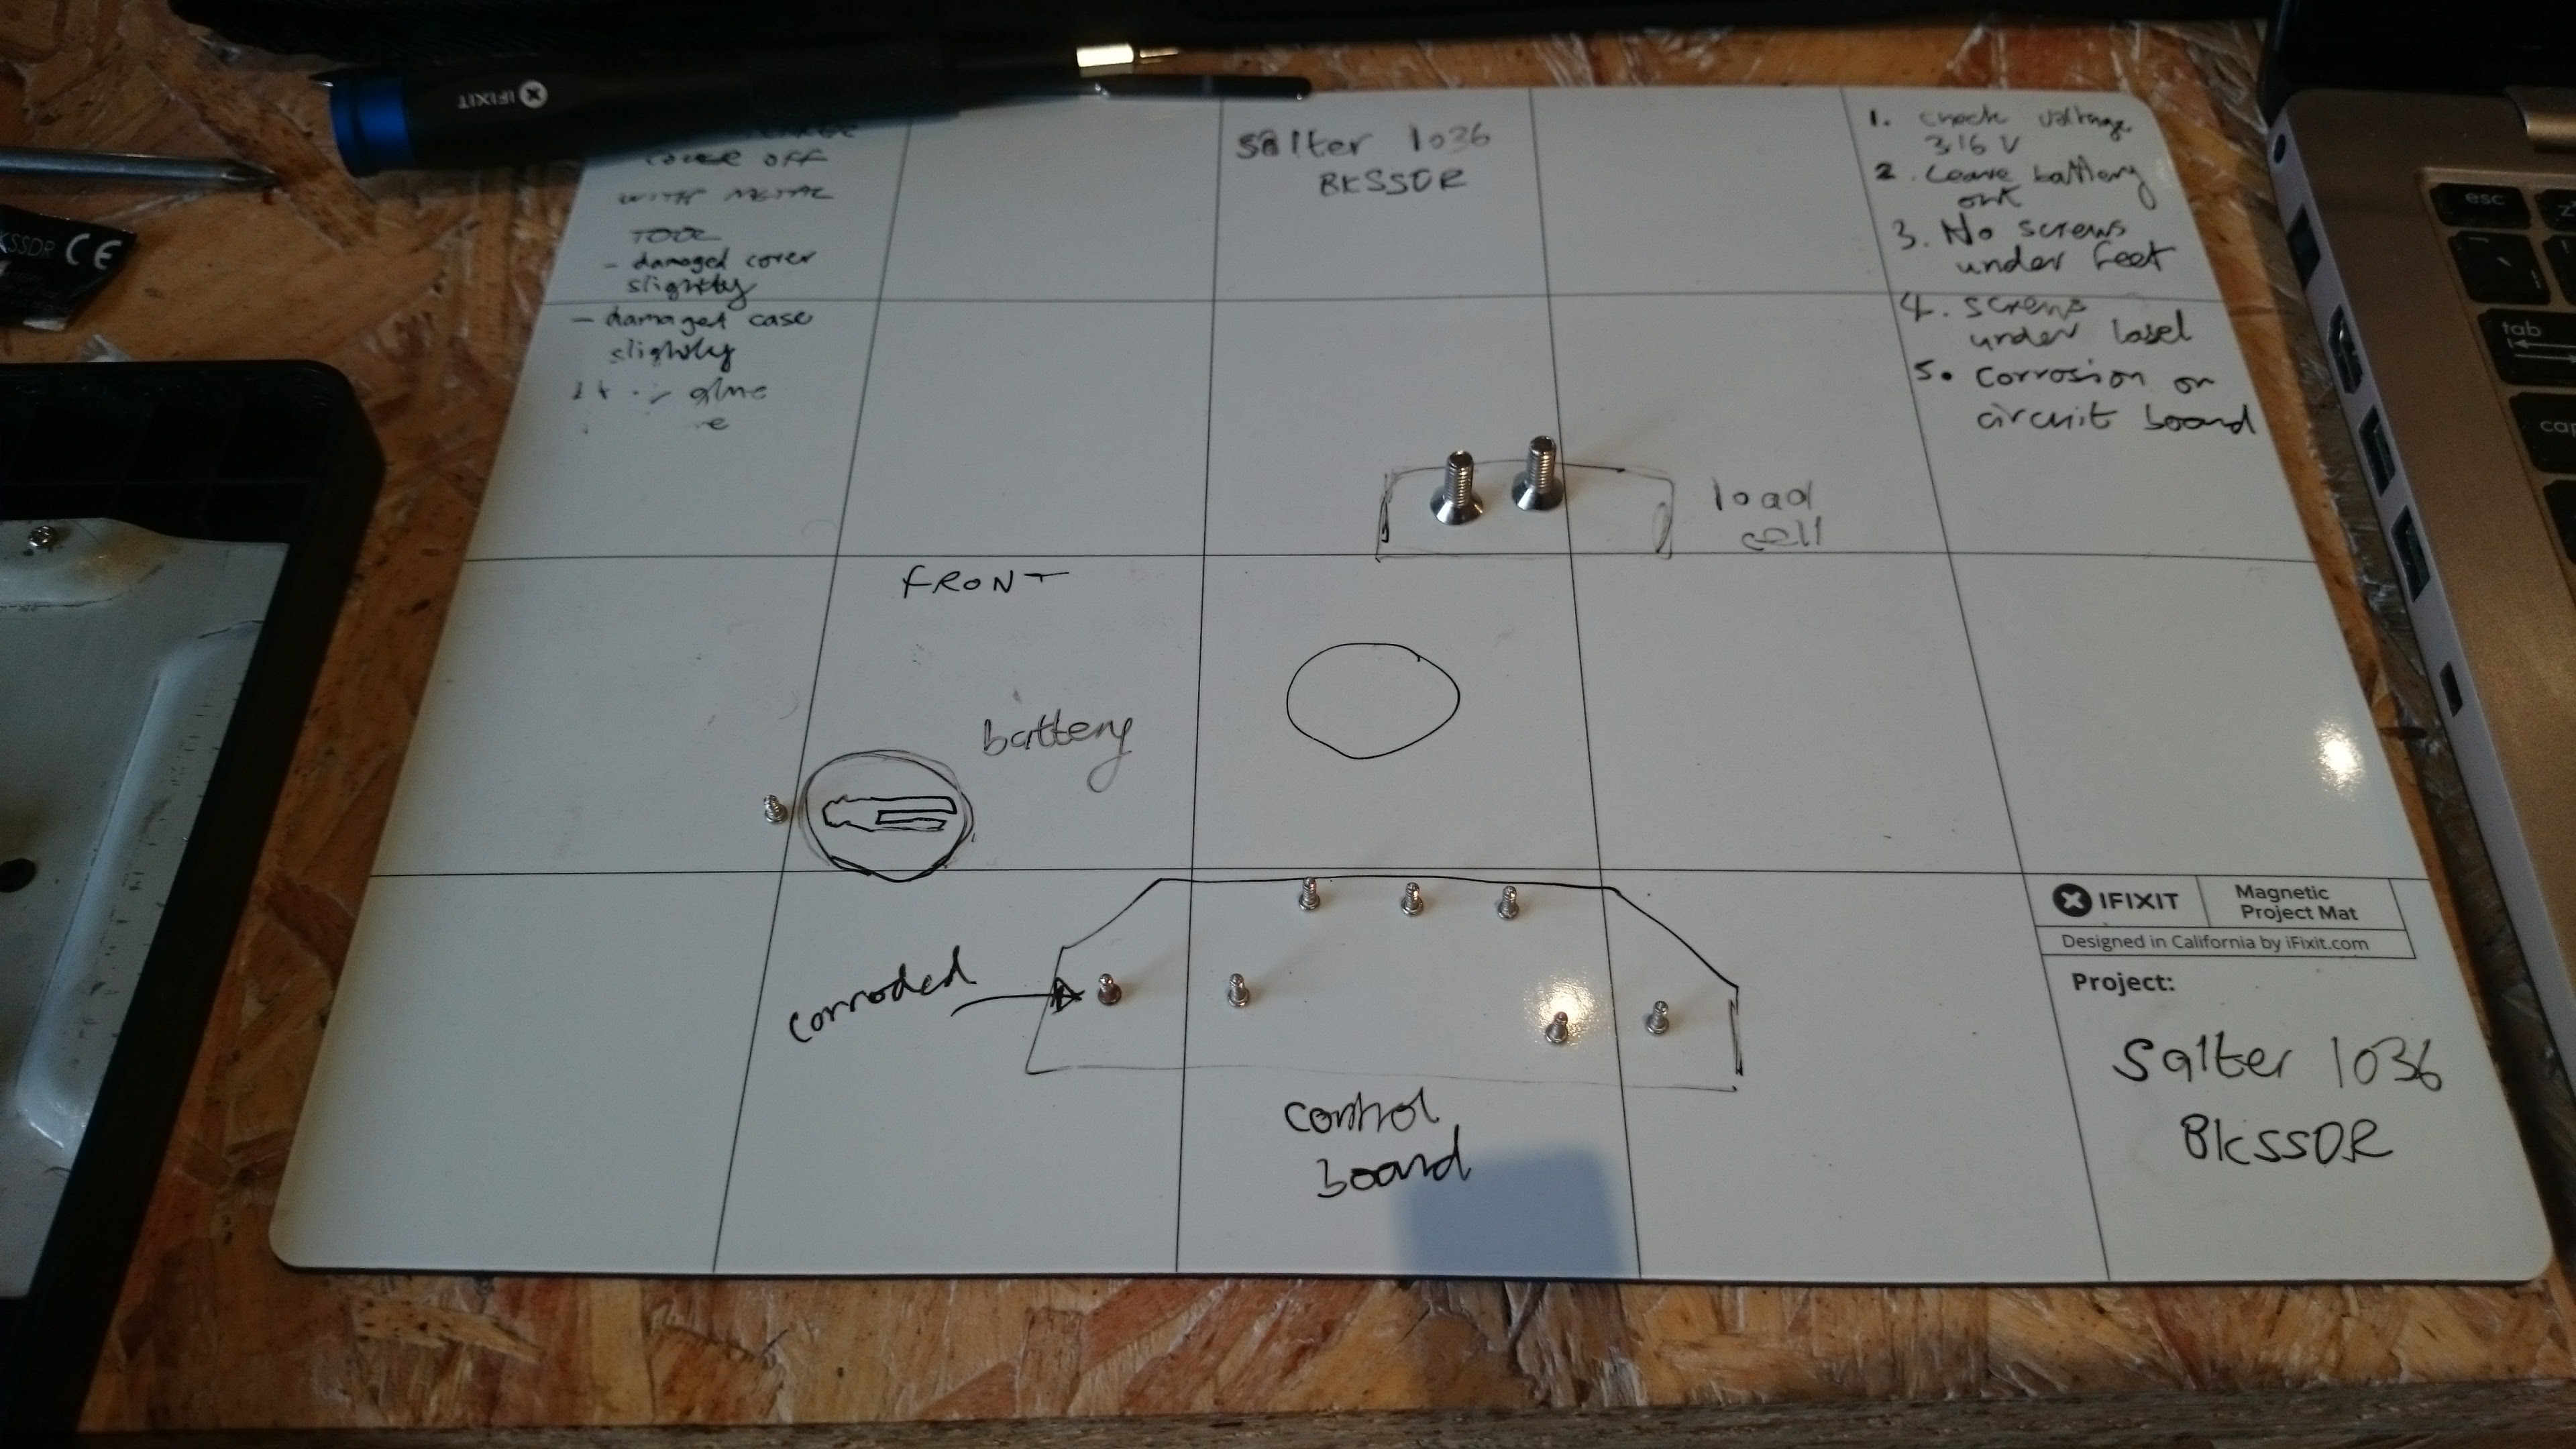
So next step was to take the battery out and then open the scales up and to have a peek around. There are no visible screws anywhere on the unit, so the most likely options for their location is under the rubber feet or under the label on the bottom. I took a look online for some design diagrams first, but could only find PDFs of the (very basic) user manual. There’s one question and answer on the 1036 on iFixit, and the answer suggests looking under the feet and the label. So I gently pried off a couple of the rubber feet, but nothing under there – then tried under the label. It tore when pulling it off, but lo and behold yep two largish cross-head screws. Undo those and you’re in.
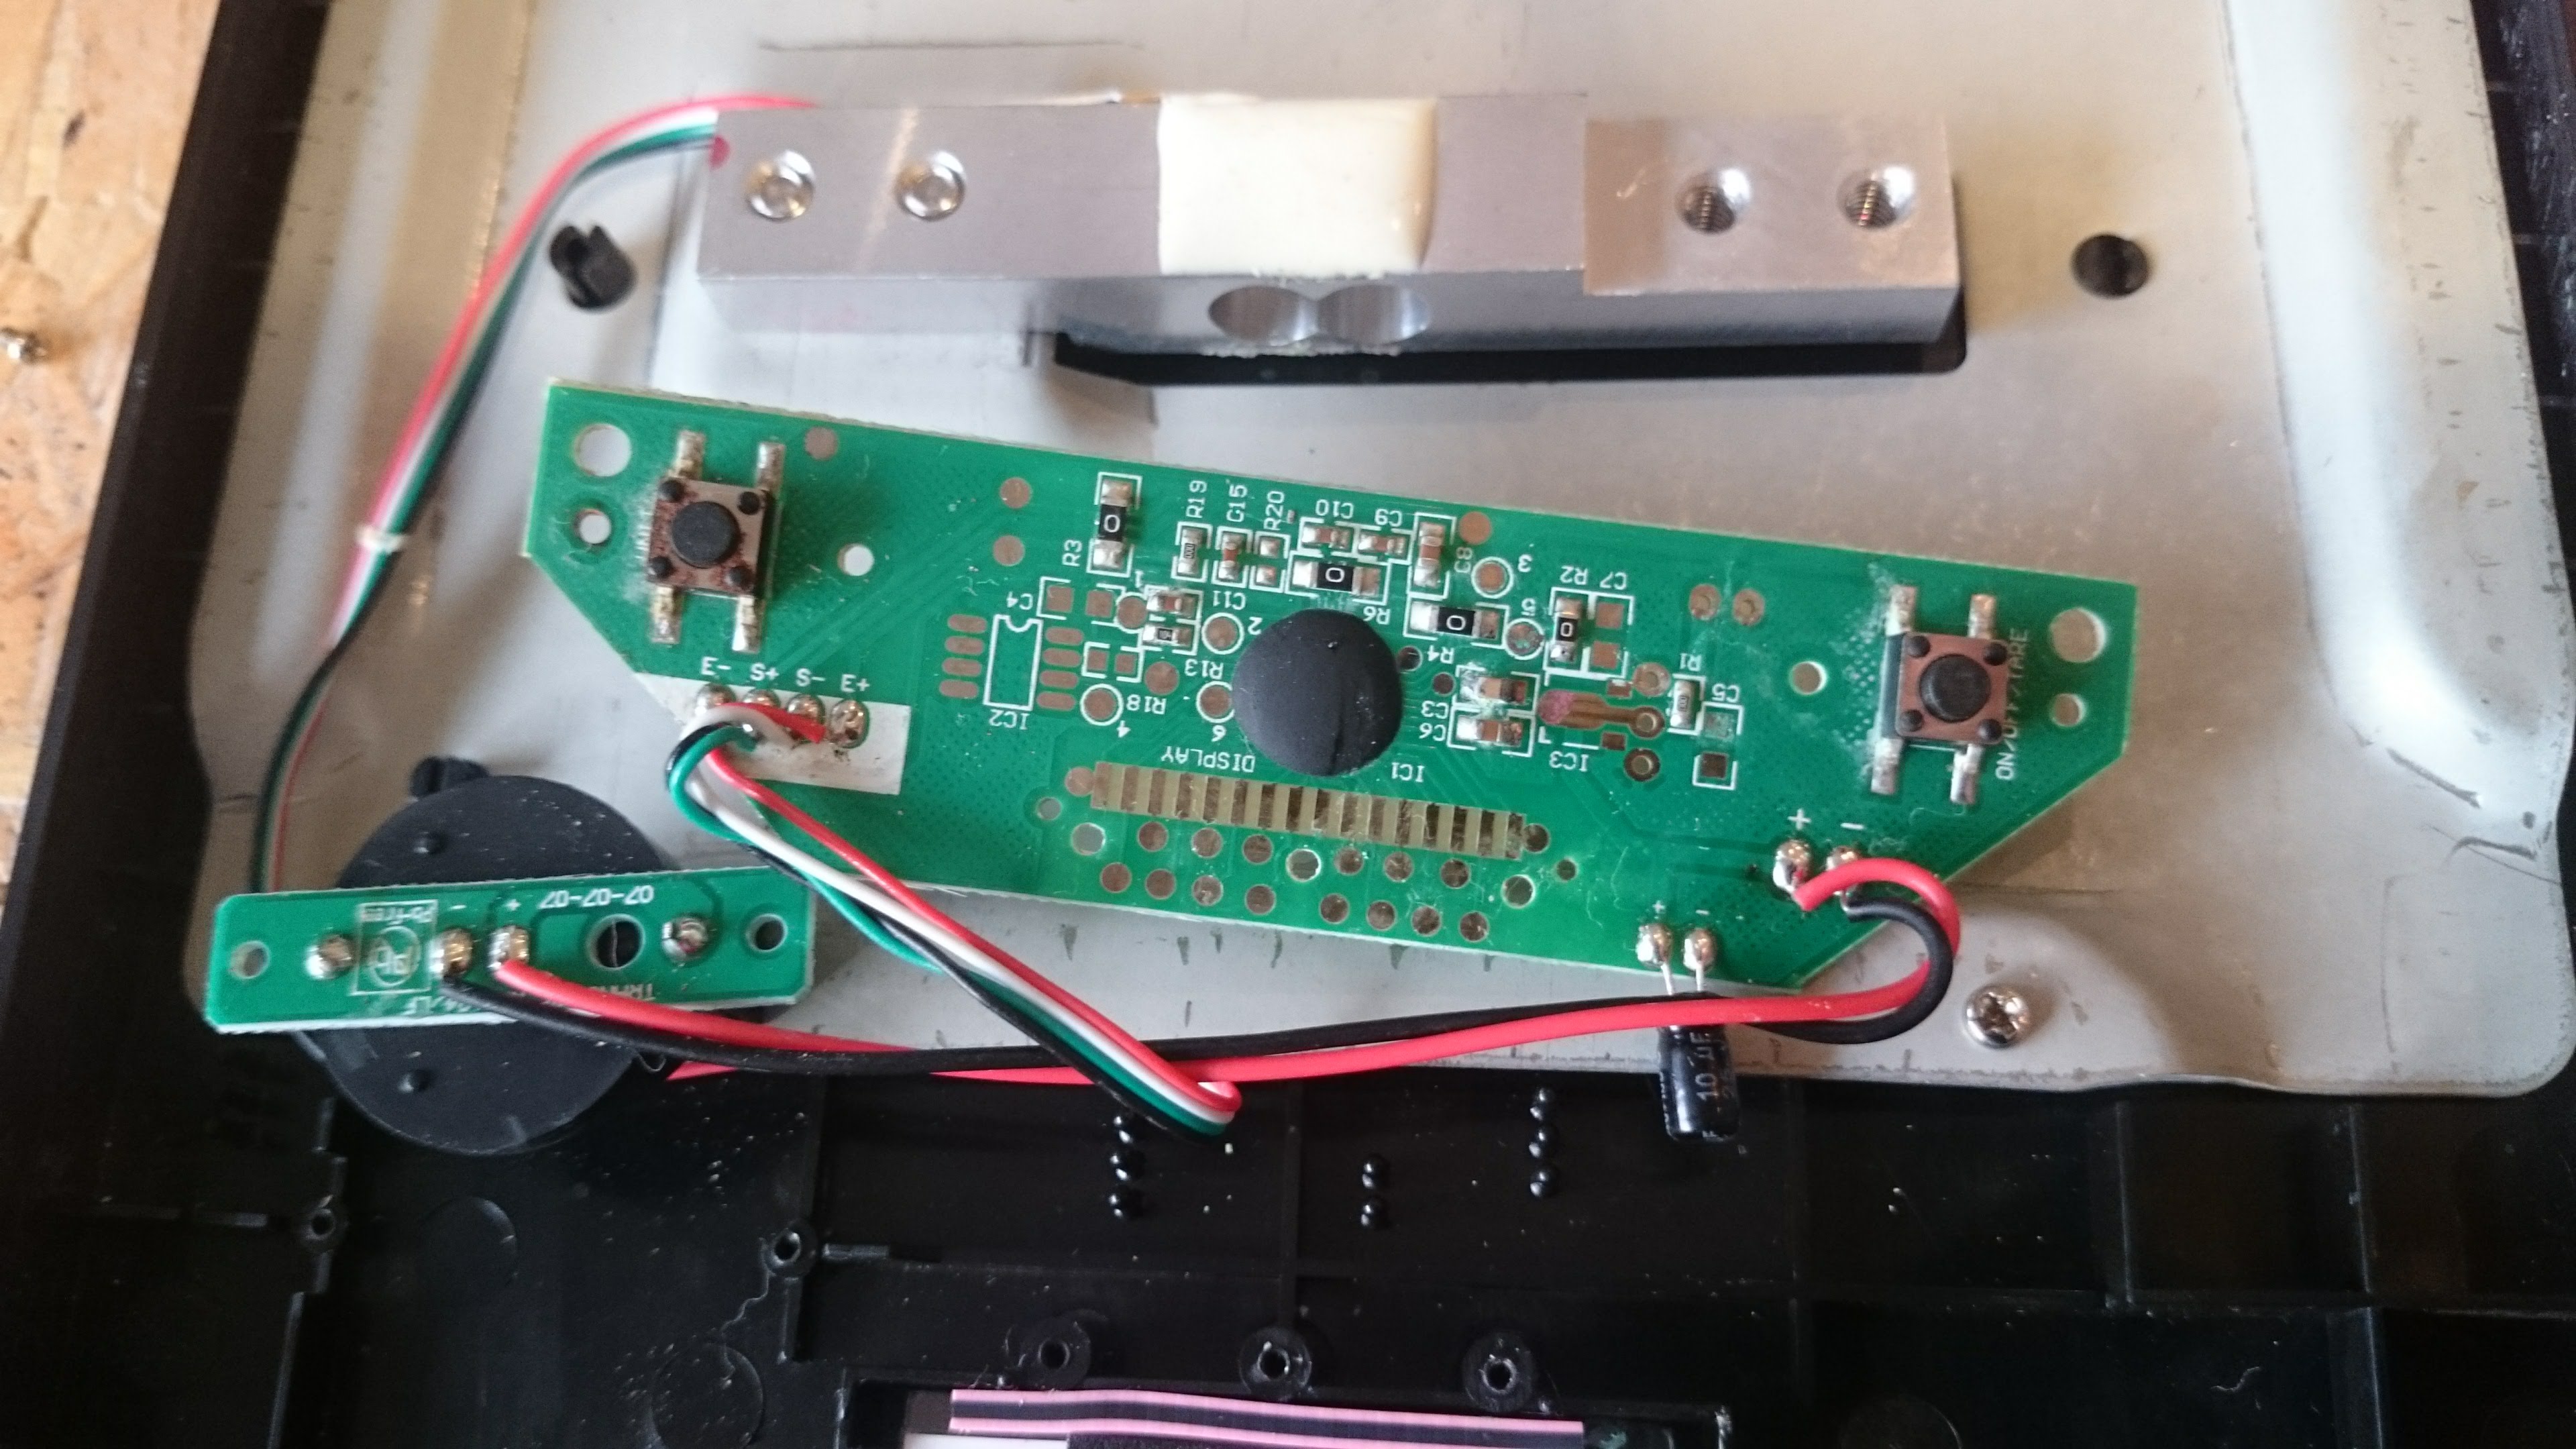
Those screws went directly into the load cell, which is at the top of the image above.
The other main components you see when you get in are the main circuit board that the controls are connected to, which also connects to the battery board and the load cell. You can unscrew the control board and the battery board with a small cross-head screwdriver. In the image above I’ve already unscrewed them and flipped them over.
water damage
So when we saw the flipside of the control board, we could see there was quite a lot of corrosion. The next step then was to try and clean the circuit. First I used some compressed air to clean off some of the debris, and then we had IPA (isopropyl alcohol) and cotton buds to hand, so I had a go with that.
A lot of the corrosion came off, but some of it was quite stubborn – the damage was pretty bad. I didn’t manage to get all of it off. A close look at the board through an eye loupe showed some of the components looked pretty messed up.
It didn’t look particularly promising, but I boxed it all back up again, put the battery back in and tried to turn it on – no joy. Seems like the board was too damaged.
solution
Seems like the only solution would be to contact Salter and see if replacement PCBs are available for the scales. Not going to hold my breath on that one, but no harm in getting in touch.
prevention
The way to prevent this particular problem would be to try and avoid getting any water in the scales.
Have a similar issue and have been through all your processes without success. No visible damage although there is an error message.
Contacted Salter who said there were no local authorised repairers. Would be interested to know if you get a PCB replacement.
Hi Anna – sadly they did not provide a replacement circuit board.
This is the reply I got from Salter:
“Thank you for your email regarding a replacement circuit board for the Salter 1036.
We regret to inform you that we do not have those parts available.
Please accept our apologies for any inconvenience this may have caused”
Please can anyone advise me howto gently remove the battery on my 1036 scales. I have tried with my finger, then thumb nails. Husband tried. I tried with the paper knife. Levering and knocking. Is there a secret lever somewhere?
Hi Olive. I don’t have the scales anymore so can’t check unfortunately. The manual is here: http://www.salterhousewares.co.uk/media/instructions/1036_Instruction_Manual.pdf but doesn’t give any advice on removing the battery. You could try asking a question on ifixit and seeing if you get any help there: https://www.ifixit.com/Device/Salter_1036_BKSSDR
Hi Olive
On one side of the battery holder there is a catch holding the battery in place. Use small flat screwdriver and push it outward to release the battery.
Same problem – corrosion and not possible to clean it – very annoying!
Just soldering new buttons on mine did the trick. The other components on the board, aside from the display connector, can’t really get damaged by corrosion.
Poor design when a device is expected to weigh liquids and be cleaned with liquid (not submerging!). Thanks for the screw location hint, I was surprised that it would only be secured in the middle. Mine works again after a good IPA daubing.
I just repaired mine. it would not power on at all. Opened it as above and checked the cell voltage, it was 1.2V with a new battery. The springs in the base of the cell holder had weakened, just bending them up a little solved the problem.
Gained access to casing, found nothing. Now find load cell has ” sprung up” so that casing cannot be reassembled.
Possibly SALTER tamper proof technique which works very well for them. I’m sure they won’t deal with any warranty now. Still, its a chance you take, and live with. Back to my old “Mason Cash” electronic digital scales that are certainly easy to put right in most cases
Thank you! Only post I could find on this scale.